Quantcast
Channel: yanfly.moe
Viewing all 184 articles
Browse latest View live

Librarium Animated – Darkness Titan Ilnoct

$
0
0

ilnoctrbanner

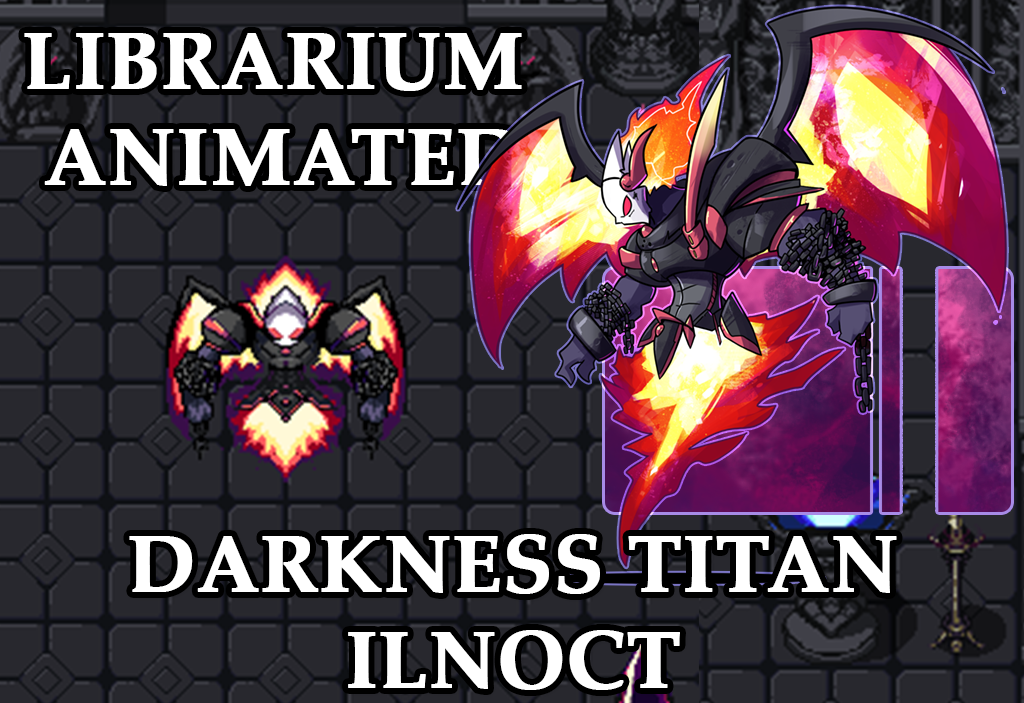
Today we see the release of Darkness Titan Ilnoct! As suggested by SenG, based on an older Librarium release!

Deep underground, chained to Tartarus itself, there lies a legend. The architect of the primordial sin. A creature filled with nothing but malice, the titan of eternal darkness. The chain snaps. The force of terror rushes to the surface and breaks open the very Earth. Ilnoct the Imprisoned One has returned, and he is looking to resume his reign of fear.  -SenG

Download it today!

Support Ækashics for more content like this!

Ækashics on Twitter!

Ækashics on Youtube!

Ækashics on Tumblr!

Ækashics on Gumroad!

Ækashics on Instagram!

Librarium Monster suggestion box!

Map sprites, facesets and more!


Ocean’s Dream Nostalgia Pack

$
0
0

OceansDream

Our friend, Ocean’s Dream, has a resource pack for sale for only $5! You can find it here!

**Sale going on from March 31st to April 7th!**

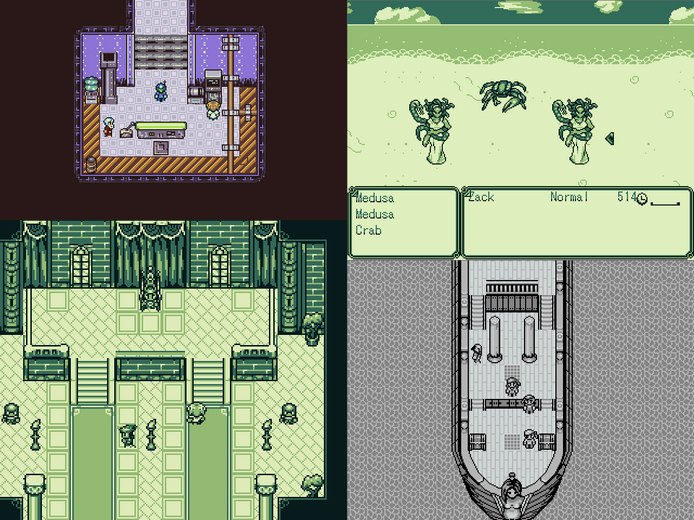
This is a royalty-free resource pack made in a nostalgic gameboy style! It is available in green, gray, and colored versions!

This pack contains:

  • 11 Animation sheets
  • 13 Battle backgrounds
  • 10 character sprite sheets, containing animal sets, chests, doors, enemies, heroes and NPCs
  • 56 enemy sprites
  • HP gauge pictures and numbers
  • Icon sheets, system menu sets
  • 7 tilesets: Dungeon, Exterior, Futuristic, Interior, Overworld, Ship and Town
  • 16 midi/ogg songs
  • Bonus iconsheet with 49 icons for use with another project

Can be used with any program/engine you choose, but is already formatted to work with RPG Maker 2003, VX Ace or MV!

Check it out here!

YEP.165 – Options Core – RPG Maker MV

$
0
0

Yanfly Engine Plugins is a plugin library made for RPG Maker MV, a wonderful piece of software to help you make that role playing game of your dreams. You can find out more about RPG Maker MV here.

You can grab the plugin here:
English Dropbox
English Mirror

Support Team Yanfly on Patreon

The Options Menu can be the one thing that can change how comfortable a player is with your game. Within the Options Menu, the player can alter any given settings to their liking adjusting to their playstyle. By default, settings like ‘Always Dash’ and ‘Command Remember’ are included in RPG Maker MV and other plugins made for RPG Maker MV may also add in newer options to the list. However, the menus themselves were always a bit iffy to look at and/or adjust. This plugin gives the Options Menu a visual makeover and full control over what options can be added to the menu to befit your players!

Also as of this release, these plugins have been updated for compatibility with YEP_OptionsCore.js. Be sure to download and update them in your game project(s).
– GamepadConfig.js
– YEP_AnimateTilesOption.js
– YEP_BattleAniSpeedOpt.js
– YEP_FpsSynchOption.js
– YEP_KeyboardConfig.js
– YEP_X_ActSeqPack3.js
– YEP_X_BattleSysATB.js
– YEP_X_DifficultySlider.js


Introduction


WARNING: This plugin is to be used with RPG Maker MV 1.5.0 or above! This is because the MV 1.5.0+ editor allows for this plugin to be made in an orderly and efficient manner. Please make sure your RPG Maker MV software is up to date before using this plugin.

The Options Menu can be the one thing that can change how comfortable a player is with your game. Within the Options Menu, the player can alter any given settings to their liking adjusting to their playstyle. By default, settings like ‘Always Dash’ and ‘Command Remember’ are included in RPG Maker MV and other plugins made for RPG Maker MV may also add in newer options to the list. However, the menus themselves were always a bit iffy to look at and/or adjust. This plugin gives the Options Menu a visual makeover and full control over what options can be added to the menu to befit your players!

This plugin supports the following plugins:
– GamepadConfig.js
– YEP_AnimateTilesOption.js
– YEP_BattleAniSpeedOpt.js
– YEP_FpsSynchOption.js
– YEP_KeyboardConfig.js
– YEP_X_ActSeqPack3.js
– YEP_X_BattleSysATB.js
– YEP_X_DifficultySlider.js

Please update them to the latest versions, too, in order to have compatibility with the Options Core.


Instructions – Option Categories Plugin Parameters


This plugin adds in ‘Option Categories’ into the Options Menu. Aside from the ‘All’ and ‘Exit’ categories, all of the categories are customizable from the way they appear in the menu to the way they behave.

Here is how each parameter behaves:

– – – – – – – – – – – – – – – – – – – – – – – – – – – – – – – – – – – – – –
Name:
– Determines the way the Category name appears. Name or rename categories as you see fit. You can use text codes with this parameter, allowing you to add icons (\i[x]) or change the text color (\c[x]) of the category.
– – – – – – – – – – – – – – – – – – – – – – – – – – – – – – – – – – – – – –
Help Description:
– This is the text shown in the help window at the top of the Options Menu whenever this category is highlighted. Use it to describe what types of options will appear in this category and how they will affect the game. You may also use text codes with this parameter.

Options List:
– This is the list of options that appear on the right side of the Options Menu when this category is highlighted or selected. You can add, edit, move around, or delete options from this list as you see fit. For details on how the plugin parameters for the Options List work, look in the next section below:
– – – – – – – – – – – – – – – – – – – – – – – – – – – – – – – – – – – – – –


Instructions – Option List Plugin Parameters


This section explains how the plugin parameters for the Options List operate and how they interact with the rest of the plugin.
– – – – – – – – – – – – – – – – – – – – – – – – – – – – – – – – – – – – – –
Name:
– Determines the way the Options name appears. Name or rename the option as you see fit. This does not use the command names provided by other plugins by default. You can use text codes with this parameter, allowing you to add icons (\i[x]) or change the text color (\c[x]) of the option.

* If you name this as ‘EVAL: code’ without the ‘quotes’, the name of this option will be whatever string that the code outputs.
– – – – – – – – – – – – – – – – – – – – – – – – – – – – – – – – – – – – – –
Help Description:
– This is the text shown in the help window at the top of the Options Menu whenever this option is highlighted. Use it to describe what this option changes for the game.

Symbol:
– This is the identifier for the option. Each option should have a unique symbol, so much as to not cause conflicts within the Options Settings. However, shared symbols are perfectly fine as long as you’re fine with them performing the same functions when selected.

Show/Hide:
– This is the code used to determine if this option will be visible on the list of options within this category.

To make sure it always shows, use the following code:
show = true;

Enable:
– This is the code used to determine if this option will be enabled. It is recommended that you leave all options as enabled as to not lock away options from the player.

To make sure it is always enabled, use the following code:
enabled = true;

Ext:
– Stands for extension. This serves as a secondary symbol for the option and it can be used for pretty much anything. It has no direct impact on the option unless the option’s effect is related to the extension value. The majority of options do not need to make use of the Ext value so it is best to just leave this alone.

To leave it alone the following code:
ext = 0;
– – – – – – – – – – – – – – – – – – – – – – – – – – – – – – – – – – – – – –
The following section is best left untouched if you do not know any JS programming and don’t have instructions on how to set it up. This is because all of the behaviors related to the options can be controlled from here and a mistake can crash the game.

Make Command Code:
– This is the code used to add the option command to the list of options. Use this to modify the name, symbol, if it is enabled, or change the ext value before finally adding it to the list.

The default code:
this.addCommand(name, symbol, enabled, ext);


Draw Option Code:
– This is how the option is ‘drawn’ onto the Options window and seen by your players. Everything here controls the way the option looks from the way it is named to the position of the text. The majority of the variables defined towards the beginning of the default code is placed there for the sake of convenience.

The default code:
var rect = this.itemRectForText(index);
var statusWidth = this.statusWidth();
var titleWidth = rect.width – statusWidth;
this.resetTextColor();
this.changePaintOpacity(this.isCommandEnabled(index));
this.drawOptionsName(index);
this.drawOptionsOnOff(index);

Process OK Code:
– This is the code that runs when the player presses any kind of confirm button (Z, Enter, Left Click) on this option. For most options, this will switch between an ON/OFF option. For others, this will make the value of the option scale upwards until it loops back.

The default code:
var index = this.index();
var symbol = this.commandSymbol(index);
var value = this.getConfigValue(symbol);
this.changeValue(symbol, !value);


Cursor Right Code:
– This is the code that runs when the player presses the RIGHT button. Usually, this will move most options into an ON position. For others, this will scale the value of the option upward.

The default code:
var index = this.index();
var symbol = this.commandSymbol(index);
var value = this.getConfigValue(symbol);
this.changeValue(symbol, true);


Cursor Left Code:
– This is the code that runs when the player presses the LEFT button. Usually, this will move most options into an OFF position. For others, this will scale the value of the option downward.

The default code:
var index = this.index();
var symbol = this.commandSymbol(index);
var value = this.getConfigValue(symbol);
this.changeValue(symbol, false);


Default Config Code:
– When creating new options, this determines the default value of the option. For most options, this starts in an OFF position, which is usually represented by a ‘false’ boolean.

The default code:
ConfigManager[symbol] = false;


Save Config Code:
– This determines how saving the Options Settings is done through code. Normally, this takes on the value as it is for the ConfigManager.

The default code:
config[symbol] = ConfigManager[symbol];


Load Config Code:
– This determines how the ConfigManager loads the saved Options Settings upon the loading of the game. Normally, this takes on whatever settings stored within the config file and plants it straight into the ConfigManager directly.

The default code:
ConfigManager[symbol] = !!config[symbol];


Happy RPG Making!


RPG Maker MV 1.6.1 (beta) Update

$
0
0

1.6.1

RPG Maker MV has updated to version 1.6.1! Well, the beta version. You can either update it on Steam or get the standalone download from here. Overall, this is the second attempt to go back to 1.6.x, where RPG Maker MV will use updated Node JS. This will increase performance. Only this time, it looks to me like they’ve fixed the majority of the bugs (others either unknown or otherwise outside of their control).

A large number of plugins have been updated as a response to this, mostly in preparation for 1.6.1’s finalization.

Plugin Updates as of Launch Date to 2018.04.14~

To download all available plugins, click here.

Core Plugins

Battle Plugins

Item Plugins

Equip Plugins

Gameplay Plugins

Quest Plugins

Options Menu

Utility Plugins

View the changelog here.

To download all available plugins, click here.

Anyway, here’s the changelog/differences between 1.5.2 and 1.6.1 beta here:


rpg_core.js


  • Utils.isOptionValid function updated with fail saves
  • WebAudio.prototype._startPlaying function updated for loopLength variable

rpg_manager.js


  • No changes

rpg_objects.js


  • Game_Interpreter.prototype.command113 (break loop) function updated

rpg_scenes.js


  • No changes

rpg_sprites.js


  • No changes

rpg_windows.js


  • No changes

Conclusion


From what I can tell during this short period of time, the 1.6.1 beta is safe to migrate towards. It does not force your project to update to the latest version, which means the updated Core Updates and Desktop Optimization can take care of the base code updates for you (without you needing to manually change things around). However, like always, be sure to make a back up of your game project(s) before updating.


Happy RPG Making!


2018.04.15 – Plugin Update!

$
0
0

~Plugin Update

For some reason, the plugins I’ve listed yesterday didn’t update upon uploading on Dropbox and the Yanfly.moe links. They should be updated properly today. Sorry for the inconvenience.

Plugin Updates as of Launch Date to 2018.04.14~

To download all available plugins, click here.

Core Plugins

Battle Plugins

Item Plugins

Equip Plugins

Gameplay Plugins

Quest Plugins

Options Menu

Utility Plugins

View the changelog here.

To download all available plugins, click here.

Cheat Menu – Part 1 –“God Mode”– RPG Maker MV

$
0
0

Yanfly Engine Plugins is a plugin library made for RPG Maker MV, a wonderful piece of software to help you make that role playing game of your dreams. You can find out more about RPG Maker MV here.

Support Team Yanfly on Patreon.

This is the beginning of a new video series that will explain, step by step, how to create a cheat menu/assist mode for your game! Cheat menus/Assist Mode are features in modern games that are becoming more and more common. As play styles types vary from player to player, so will be what they expect out of their games. And what a better way to start things off than with the ever so staple “God Mode” cheat?

This advice video uses the following plugins:

You can grab the copy/paste code here:


Enable Cheats – Option Parameters


This section gives the exact plugin parameters used for the “Enable Cheats” option found in the video above.

Settings

Help Description: 
Turning this ON will allow the options below to take effect.
Set this as OFF to disable all Cheat options.
Symbol: 
CheatsEnabled
Show/Hide: 
show = true;
Enable: 
enabled = true;
Ext: 
ext = 0;

Functions

Make Option Code:
this.addCommand(name, symbol, enabled, ext);
Draw Option Code:
var rect = this.itemRectForText(index);
var statusWidth = this.statusWidth();
var titleWidth = rect.width - statusWidth;
this.resetTextColor();
this.changePaintOpacity(this.isCommandEnabled(index));
this.drawOptionsName(index);
this.drawOptionsOnOff(index);
Process OK Code:
var index = this.index();
var symbol = this.commandSymbol(index);
var value = this.getConfigValue(symbol);
this.changeValue(symbol, !value);
Cursor Right Code:
var index = this.index();
var symbol = this.commandSymbol(index);
var value = this.getConfigValue(symbol);
this.changeValue(symbol, true);
Cursor Left Code:
var index = this.index();
var symbol = this.commandSymbol(index);
var value = this.getConfigValue(symbol);
this.changeValue(symbol, false);
Default Config Code:
ConfigManager[symbol] = false;
Save Config Code:
config[symbol] = ConfigManager[symbol];
Load Config Code:
ConfigManager[symbol] = !!config[symbol];

Line Break – Option Parameters


This section gives the exact plugin parameters used for the “Line Break” option found in the video above.

Settings

Help Description: 
Symbol:
none
Show/Hide: 
show = true;
Enable: 
enabled = true;
Ext: 
ext = 0;

Functions

Make Option Code:
this.addCommand(name, symbol, enabled, ext);
Draw Option Code:
Process OK Code:
Cursor Right Code:
Cursor Left Code:
Default Config Code:
Save Config Code:
Load Config Code:


God Mode – Option Parameters


This section gives the exact plugin parameters used for the “God Mode” option found in the video above.

Settings

Help Description: 
Allies cannot be K.O'd in battle
even if they are at 0 HP.
Symbol: 
CheatGodMode
Show/Hide: 
show = true;
Enable: 
enabled = true;
Ext: 
ext = 0;

Functions

Make Option Code:
this.addCommand(name, symbol, enabled, ext);
Draw Option Code:
var rect = this.itemRectForText(index);
var statusWidth = this.statusWidth();
var titleWidth = rect.width - statusWidth;
this.resetTextColor();
this.changePaintOpacity(this.isCommandEnabled(index));
this.drawOptionsName(index);
this.drawOptionsOnOff(index);
Process OK Code:
var index = this.index();
var symbol = this.commandSymbol(index);
var value = this.getConfigValue(symbol);
this.changeValue(symbol, !value);
Cursor Right Code:
var index = this.index();
var symbol = this.commandSymbol(index);
var value = this.getConfigValue(symbol);
this.changeValue(symbol, true);
Cursor Left Code:
var index = this.index();
var symbol = this.commandSymbol(index);
var value = this.getConfigValue(symbol);
this.changeValue(symbol, false);
Default Config Code:
ConfigManager[symbol] = false;
Save Config Code:
config[symbol] = ConfigManager[symbol];
Load Config Code:
ConfigManager[symbol] = !!config[symbol];

God Mode State – Notebox Code


Insert the following code into the God Mode State’s Notebox.

<Custom Passive Condition>
condition = ConfigManager.CheatsEnabled && ConfigManager.CheatGodMode;
</Custom Passive Condition>

This requires Auto Passive States to be installed. Remember to place this state’s ID in the Actors List in the Auto Passive States plugin parameters!


Happy RPG Making!


Cheat Menu – Part 2 – Anti-Grief – RPG Maker MV

$
0
0

Yanfly Engine Plugins is a plugin library made for RPG Maker MV, a wonderful piece of software to help you make that role playing game of your dreams. You can find out more about RPG Maker MV here.

Support Team Yanfly on Patreon

Part 2 of the Cheat Menu series is here! Today, we’ll be exploring Anti-Grief options to reduce player stress while playing your game(s). The four options we’ll be exploring today will be Resist Ailments, Resist Debuffs, No Encounters, and No Surprise Attacks.

This advice video uses the following plugins:

You can grab the copy/paste code here:


Resist Ailments State – Notebox Code


Insert the following code into the notebox of your Resist Ailments State.

<Custom Passive Condition>
condition = ConfigManager.CheatsEnabled &&
ConfigManager.CheatResistAilments;
</Custom Passive Condition>

This requires Auto Passive States to be installed. Remember to place this state’s ID in the Actors List in the Auto Passive States plugin parameters!


Resist Ailments – Option Parameters


This section gives the exact plugin parameters used for the “Resist Ailments” option found in the video above.

Settings

Help Description:
Allies will resist all status ailments.
Symbol:
CheatResistAilments
Show/Hide:
show = true;
Enable:
enabled = true;
Ext:
ext = 0;

Functions

Make Option Code:
this.addCommand(name, symbol, enabled, ext);
Draw Option Code:
var rect = this.itemRectForText(index);
var statusWidth = this.statusWidth();
var titleWidth = rect.width - statusWidth;
this.resetTextColor();
this.changePaintOpacity(this.isCommandEnabled(index));
this.drawOptionsName(index);
this.drawOptionsOnOff(index);
Process OK Code:
var index = this.index();
var symbol = this.commandSymbol(index);
var value = this.getConfigValue(symbol);
this.changeValue(symbol, !value);
Cursor Right Code:
var index = this.index();
var symbol = this.commandSymbol(index);
var value = this.getConfigValue(symbol);
this.changeValue(symbol, true);
Cursor Left Code:
var index = this.index();
var symbol = this.commandSymbol(index);
var value = this.getConfigValue(symbol);
this.changeValue(symbol, false);
Default Config Code:
ConfigManager[symbol] = false;
Save Config Code:
config[symbol] = ConfigManager[symbol];
Load Config Code:
ConfigManager[symbol] = !!config[symbol];

Resist Debuffs State – Notebox Code


Insert the following code into the notebox of your Resist Debuffs State.

<Custom Passive Condition>
condition = ConfigManager.CheatsEnabled &&
ConfigManager.CheatResistDebuffs;
</Custom Passive Condition>

This requires Auto Passive States to be installed. Remember to place this state’s ID in the Actors List in the Auto Passive States plugin parameters!


Resist Debuffs – Option Parameters


This section gives the exact plugin parameters used for the “Resist Debuffs” option found in the video above.

Settings

Help Description:
Allies will resist all debuffs.
Symbol:
CheatResistDebuffs
Show/Hide:
show = true;
Enable:
enabled = true;
Ext:
ext = 0;

Functions

Make Option Code:
this.addCommand(name, symbol, enabled, ext);
Draw Option Code:
var rect = this.itemRectForText(index);
var statusWidth = this.statusWidth();
var titleWidth = rect.width - statusWidth;
this.resetTextColor();
this.changePaintOpacity(this.isCommandEnabled(index));
this.drawOptionsName(index);
this.drawOptionsOnOff(index);
Process OK Code:
var index = this.index();
var symbol = this.commandSymbol(index);
var value = this.getConfigValue(symbol);
this.changeValue(symbol, !value);
Cursor Right Code:
var index = this.index();
var symbol = this.commandSymbol(index);
var value = this.getConfigValue(symbol);
this.changeValue(symbol, true);
Cursor Left Code:
var index = this.index();
var symbol = this.commandSymbol(index);
var value = this.getConfigValue(symbol);
this.changeValue(symbol, false);
Default Config Code:
ConfigManager[symbol] = false;
Save Config Code:
config[symbol] = ConfigManager[symbol];
Load Config Code:
ConfigManager[symbol] = !!config[symbol];

No Encounters State – Notebox Code


Insert the following code into the notebox of your No Encounters State.

<Custom Passive Condition>
condition = ConfigManager.CheatsEnabled &&
ConfigManager.CheatNoEncounters;
</Custom Passive Condition>

This requires Auto Passive States to be installed. Remember to place this state’s ID in the Actors List in the Auto Passive States plugin parameters!


No Encounters – Option Parameters


This section gives the exact plugin parameters used for the “No Encounters” option found in the video above.

Settings

Help Description:
Stop random encounters from occurring.
Symbol:
CheatNoEncounters
Show/Hide:
show = true;
Enable:
enabled = true;
Ext:
ext = 0;

Functions

Make Option Code:
this.addCommand(name, symbol, enabled, ext);
Draw Option Code:
var rect = this.itemRectForText(index);
var statusWidth = this.statusWidth();
var titleWidth = rect.width - statusWidth;
this.resetTextColor();
this.changePaintOpacity(this.isCommandEnabled(index));
this.drawOptionsName(index);
this.drawOptionsOnOff(index);
Process OK Code:
var index = this.index();
var symbol = this.commandSymbol(index);
var value = this.getConfigValue(symbol);
this.changeValue(symbol, !value);
Cursor Right Code:
var index = this.index();
var symbol = this.commandSymbol(index);
var value = this.getConfigValue(symbol);
this.changeValue(symbol, true);
Cursor Left Code:
var index = this.index();
var symbol = this.commandSymbol(index);
var value = this.getConfigValue(symbol);
this.changeValue(symbol, false);
Default Config Code:
ConfigManager[symbol] = false;
Save Config Code:
config[symbol] = ConfigManager[symbol];
Load Config Code:
ConfigManager[symbol] = !!config[symbol];

No Surprise Attacks State – Notebox Code


Insert the following code into the notebox of your No Surprise Attacks State.

<Custom Passive Condition>
condition = ConfigManager.CheatsEnabled &&
ConfigManager.CheatNoSurpriseAttacks;
</Custom Passive Condition>

This requires Auto Passive States to be installed. Remember to place this state’s ID in the Actors List in the Auto Passive States plugin parameters!


No Surprise Attacks – Option Parameters


This section gives the exact plugin parameters used for the “No Surprise Attacks” option found in the video above.

Settings

Help Description:
Prevent surprise attacks from occurring in
random encounters.
Symbol:
CheatNoSurpriseAttacks
Show/Hide:
show = true;
Enable:
enabled = true;
Ext:
ext = 0;

Functions

Make Option Code:
this.addCommand(name, symbol, enabled, ext);
Draw Option Code:
var rect = this.itemRectForText(index);
var statusWidth = this.statusWidth();
var titleWidth = rect.width - statusWidth;
this.resetTextColor();
this.changePaintOpacity(this.isCommandEnabled(index));
this.drawOptionsName(index);
this.drawOptionsOnOff(index);
Process OK Code:
var index = this.index();
var symbol = this.commandSymbol(index);
var value = this.getConfigValue(symbol);
this.changeValue(symbol, !value);
Cursor Right Code:
var index = this.index();
var symbol = this.commandSymbol(index);
var value = this.getConfigValue(symbol);
this.changeValue(symbol, true);
Cursor Left Code:
var index = this.index();
var symbol = this.commandSymbol(index);
var value = this.getConfigValue(symbol);
this.changeValue(symbol, false);
Default Config Code:
ConfigManager[symbol] = false;
Save Config Code:
config[symbol] = ConfigManager[symbol];
Load Config Code:
ConfigManager[symbol] = !!config[symbol];


Happy RPG Making!

Cheat Menu – Part 3 – Power Trip – RPG Maker MV

$
0
0

Yanfly Engine Plugins is a plugin library made for RPG Maker MV, a wonderful piece of software to help you make that role playing game of your dreams. You can find out more about RPG Maker MV here.

Support Team Yanfly on Patreon

You can’t have a cheat menu without having power trip cheats. This video will explain how to create a scale option for the player to adjust how much he or she wants to power trip! We’ll be learning things like how to add parameter multipliers, critical hit rate adjustors, and experience gain scales.

This advice video uses the following plugins:

You can grab the copy/paste code here:


Parameter Multiplier – Formula


Insert this formula into the Base Parameter Control plugin parameters.

((base + plus) * paramRate * buffRate + flat) * (user.isActor() ? (ConfigManager.CheatsEnabled ? (ConfigManager.CheatParamMulti || 1) : 1) : 1)

Make sure this is one line!


Parameter Multiplier – Option Parameters


This section gives the exact plugin parameters used for the “Parameter Multiplier” option found in the video above.

Settings

Help Description:
Increases ATK, DEF, MAT, MDF, AGI, and LUK
parameters by this multiplier.
Symbol:
CheatParamMulti
Show/Hide:
show = true;
Enable:
enabled = true;
Ext:
ext = 0;

Functions

Make Option Code:
this.addCommand(name, symbol, enabled, ext);
Draw Option Code:
var rect = this.itemRectForText(index);
var statusWidth = this.statusWidth();
var titleWidth = rect.width - statusWidth;
this.resetTextColor();
this.changePaintOpacity(this.isCommandEnabled(index));
this.drawOptionsName(index);
var value = this.getConfigValue(symbol);
var rate = value / 10;
var gaugeColor1 = this.textColor(10);
var gaugeColor2 = this.textColor(2);
this.drawOptionsGauge(index, rate, gaugeColor1, gaugeColor2);
this.drawText(value + '00%', titleWidth, rect.y, statusWidth, 'center');
Process OK Code:
var index = this.index();
var symbol = this.commandSymbol(index);
var value = this.getConfigValue(symbol);
value += 1;
if (value > 10) {
 value = 1;
}
value = value.clamp(1, 10);
this.changeValue(symbol, value);
$gameParty.members().forEach(function(member) {
 member.recoverAll();
});
Cursor Right Code:
var index = this.index();
var symbol = this.commandSymbol(index);
var value = this.getConfigValue(symbol);
value += 1;
value = value.clamp(1, 10);
this.changeValue(symbol, value);
$gameParty.members().forEach(function(member) {
 member.recoverAll();
});
Cursor Left Code:
var index = this.index();
var symbol = this.commandSymbol(index);
var value = this.getConfigValue(symbol);
value -= 1;
value = value.clamp(1, 10);
this.changeValue(symbol, value);
$gameParty.members().forEach(function(member) {
 member.recoverAll();
});
Default Config Code:
ConfigManager[symbol] = 1;
Save Config Code:
config[symbol] = ConfigManager[symbol];
Load Config Code:
var value = config[symbol];
if (value !== undefined) {
 ConfigManager[symbol] = Number(value).clamp(1, 10);
} else {
 ConfigManager[symbol] = 1;
}


Critical Hit Rate – Formula


Insert this formula into the Extra Parameter Formula plugin parameters.

(base + plus) * rate + flat + (user.isActor() ? (ConfigManager.CheatsEnabled ? ((ConfigManager.CheatCriChance || 0) / 100) : 0) : 0)

Make sure this is one line!


Critical Hit Rate – Option Parameters


This section gives the exact plugin parameters used for the “Parameter Multiplier” option found in the video above.

Settings

Help Description:
Adjusts the critical hit rate by this much.
Symbol:
CheatCriChance
Show/Hide:
show = true;
Enable:
enabled = true;
Ext:
ext = 0;

Functions

Make Option Code:
this.addCommand(name, symbol, enabled, ext);
Draw Option Code:
var rect = this.itemRectForText(index);
var statusWidth = this.statusWidth();
var titleWidth = rect.width - statusWidth;
this.resetTextColor();
this.changePaintOpacity(this.isCommandEnabled(index));
this.drawOptionsName(index);
var value = this.getConfigValue(symbol);
var rate = value / 100;
var gaugeColor1 = this.textColor(14);
var gaugeColor2 = this.textColor(6);
this.drawOptionsGauge(index, rate, gaugeColor1, gaugeColor2);
this.drawText(value + '%', titleWidth, rect.y, statusWidth, 'center');
Process OK Code:
var index = this.index();
var symbol = this.commandSymbol(index);
var value = this.getConfigValue(symbol);
value += 10;
if (value > 100) {
 value = 0;
}
value = value.clamp(0, 100);
this.changeValue(symbol, value);
Cursor Right Code:
var index = this.index();
var symbol = this.commandSymbol(index);
var value = this.getConfigValue(symbol);
value += 10;
value = value.clamp(0, 100);
this.changeValue(symbol, value);
Cursor Left Code:
var index = this.index();
var symbol = this.commandSymbol(index);
var value = this.getConfigValue(symbol);
value -= 10;
value = value.clamp(0, 100);
this.changeValue(symbol, value);
Default Config Code:
ConfigManager[symbol] = 0;
Save Config Code:
config[symbol] = ConfigManager[symbol];
Load Config Code:
var value = config[symbol];
if (value !== undefined) {
 ConfigManager[symbol] = Number(value).clamp(0, 100);
} else {
 ConfigManager[symbol] = 0;
}


EXP Multiplier – Formula


Insert this formula into the Special Parameter Formula plugin parameters.

((base + plus) * rate + flat) * (user.isActor() ? (ConfigManager.CheatsEnabled ? (ConfigManager.CheatExpMulti || 1) : 1) : 1)

Make sure this is one line!


EXP Multiplier – Option Parameters


This section gives the exact plugin parameters used for the “Parameter Multiplier” option found in the video above.

Settings

Help Description:
Increases EXP earned by this multiplier.
Symbol:
CheatExpMulti
Show/Hide:
show = true;
Enable:
enabled = true;
Ext:
ext = 0;

Functions

Make Option Code:
this.addCommand(name, symbol, enabled, ext);
Draw Option Code:
var rect = this.itemRectForText(index);
var statusWidth = this.statusWidth();
var titleWidth = rect.width - statusWidth;
this.resetTextColor();
this.changePaintOpacity(this.isCommandEnabled(index));
this.drawOptionsName(index);
var value = this.getConfigValue(symbol);
var rate = value / 10;
var gaugeColor1 = this.textColor(11);
var gaugeColor2 = this.textColor(3);
this.drawOptionsGauge(index, rate, gaugeColor1, gaugeColor2);
this.drawText(value + '00%', titleWidth, rect.y, statusWidth, 'center');
Process OK Code:
var index = this.index();
var symbol = this.commandSymbol(index);
var value = this.getConfigValue(symbol);
value += 1;
if (value > 10) {
 value = 1;
}
value = value.clamp(1, 10);
this.changeValue(symbol, value);
Cursor Right Code:
var index = this.index();
var symbol = this.commandSymbol(index);
var value = this.getConfigValue(symbol);
value += 1;
value = value.clamp(1, 10);
this.changeValue(symbol, value);
Cursor Left Code:
var index = this.index();
var symbol = this.commandSymbol(index);
var value = this.getConfigValue(symbol);
value -= 1;
value = value.clamp(1, 10);
this.changeValue(symbol, value);
Default Config Code:
ConfigManager[symbol] = 1;
Save Config Code:
config[symbol] = ConfigManager[symbol];
Load Config Code:
var value = config[symbol];
if (value !== undefined) {
 ConfigManager[symbol] = Number(value).clamp(1, 10);
} else {
 ConfigManager[symbol] = 1;
}


Happy RPG Making!


De’Vine: World of Shadows – by Stapleton

$
0
0

Coming May 4th, 2018 on Steam!

The Ancients were beings of enormous power each created on their own accord. Negative energy that lies dormant for too long within varying dimensions finds a host and thereby creating an ancient.

These Ancients threatened both Heaven and Hell. For the first and only time in all existance, Angels and Demons came together to create a trinket so strong that they only allowed those with human blood to possess it.

That is when Amos, being obsessed with the Ancients, created a blood ritual and had 2 sons of his own. Both half-demon and half-human. They were able to wield this powerful amulet and do his bidding to seal the Ancients.

But alas, Amos’ plan to sacrifice Kuan was revealed and instead Chung gave his own life to save him. Nevertheless a portal was opened to the mortal realm and an invasion of demons scourged the land.

1000 years later, Kuan awoke from his sealed prison after Master Sage Tenoch’s seal shattered. Priestess Audie and Master Sage Oat quickly but with great caution take him in and hope that he can be the new “Hero” of this age.

For just as it does every 1000 years, Lucifer sends an invasion of demons to try and reclaim the mortal realm as a stepping stone to Heaven.

From here on, it is up to Kuan to stop the invasion and put an end to malevolence once and for all!

Librarium Animated – Spiritual Fighter

$
0
0

sfighterbanner

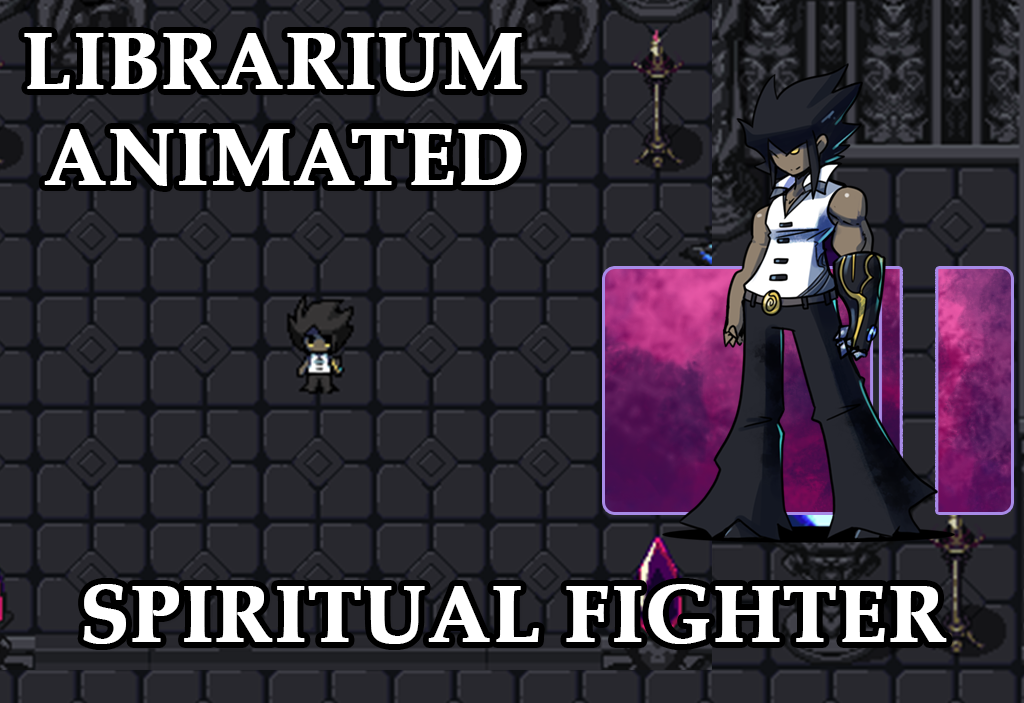
Today we see the release for the Spiritual Fighter, as suggested by Jean Enzonaki over at patreon!

A spiritual fighter decided to seek more knowledge and more power, to fill all the gaps of his doubts. In one of his travels, he found beneath a small lake, a dark blue gauntlet with engravings that he couldn’t understand. After wearing it he felt that it was sucking his life out of his body. Now he know what the artifact was: something to imprison a demon, using his vital energy trying to escape. With the understanding of the world and his strength, he stopped the demon from escaping, but now he has a bond with the demon as the gaunglet couldn’t be removed. Instead, with the fragile prison, he now channel his energies to use the demon to his will, summoning a giant blue claw to attack his enemies following the moves he does with the gauntlet.   -Jean Enzonaki

Download it today!

Support Ækashics for more content like this!

Ækashics on Twitter!

Ækashics on Youtube!

Ækashics on Tumblr!

Ækashics on Gumroad!

Ækashics on Instagram!

Librarium Monster suggestion box!

Map sprites, facesets and more!

Cheat Menu – Part 4 – Infinite Resources – RPG Maker MV

$
0
0

Yanfly Engine Plugins is a plugin library made for RPG Maker MV, a wonderful piece of software to help you make that role playing game of your dreams. You can find out more about RPG Maker MV here.

Support Team Yanfly on Patreon

The Cheat Menu series continues! Another thing that we often find in Cheat Menus are things that affect the flow of resources. This is often found in the form of infinite ammo or the like. Unfortunately, doing something like that can’t really be done without the help of plugins, but we can certainly use events to make something similar! Check out in this video how we can make HP, MP, and TP be virtually limitless!

This advice video uses the following plugins:

You can grab the copy/paste code here:


HP Recovery – Conditional Branch Script


Insert this code into a Conditional Branch event for a troop using the Base Troop Events plugin!

ConfigManager.CheatsEnabled && ConfigManager.CheatRecoverHp

Make sure this is one line!


HP Recovery – Option Parameters


This section gives the exact plugin parameters used for the “HP Recovery” option found in the video above.

Settings

Help Description:
Allies will recover full HP at the start of battle,
the start of each turn, and at the end of each turn.
Symbol:
CheatRecoverHp
Show/Hide:
show = true;
Enable:
enabled = true;
Ext:
ext = 0;

Functions

Make Option Code:
this.addCommand(name, symbol, enabled, ext);
Draw Option Code:
var rect = this.itemRectForText(index);
var statusWidth = this.statusWidth();
var titleWidth = rect.width - statusWidth;
this.resetTextColor();
this.changePaintOpacity(this.isCommandEnabled(index));
this.drawOptionsName(index);
this.drawOptionsOnOff(index);
Process OK Code:
var index = this.index();
var symbol = this.commandSymbol(index);
var value = this.getConfigValue(symbol);
this.changeValue(symbol, !value);
Cursor Right Code:
var index = this.index();
var symbol = this.commandSymbol(index);
var value = this.getConfigValue(symbol);
this.changeValue(symbol, true);
Cursor Left Code:
var index = this.index();
var symbol = this.commandSymbol(index);
var value = this.getConfigValue(symbol);
this.changeValue(symbol, false);
Default Config Code:
ConfigManager[symbol] = false;
Save Config Code:
config[symbol] = ConfigManager[symbol];
Load Config Code:
ConfigManager[symbol] = !!config[symbol];


MP Recovery – Conditional Branch Script


Insert this code into a Conditional Branch event for a troop using the Base Troop Events plugin!

ConfigManager.CheatsEnabled && ConfigManager.CheatRecoverMp

Make sure this is one line!


MP Recovery – Option Parameters


This section gives the exact plugin parameters used for the “MP Recovery” option found in the video above.

Settings

Help Description:
Allies will recover full MP at the start of battle,
the start of each turn, and at the end of each turn.
Symbol:
CheatRecoverMp
Show/Hide:
show = true;
Enable:
enabled = true;
Ext:
ext = 0;

Functions

Make Option Code:
this.addCommand(name, symbol, enabled, ext);
Draw Option Code:
var rect = this.itemRectForText(index);
var statusWidth = this.statusWidth();
var titleWidth = rect.width - statusWidth;
this.resetTextColor();
this.changePaintOpacity(this.isCommandEnabled(index));
this.drawOptionsName(index);
this.drawOptionsOnOff(index);
Process OK Code:
var index = this.index();
var symbol = this.commandSymbol(index);
var value = this.getConfigValue(symbol);
this.changeValue(symbol, !value);
Cursor Right Code:
var index = this.index();
var symbol = this.commandSymbol(index);
var value = this.getConfigValue(symbol);
this.changeValue(symbol, true);
Cursor Left Code:
var index = this.index();
var symbol = this.commandSymbol(index);
var value = this.getConfigValue(symbol);
this.changeValue(symbol, false);
Default Config Code:
ConfigManager[symbol] = false;
Save Config Code:
config[symbol] = ConfigManager[symbol];
Load Config Code:
ConfigManager[symbol] = !!config[symbol];


TP Recovery – Conditional Branch Script


Insert this code into a Conditional Branch event for a troop using the Base Troop Events plugin!

ConfigManager.CheatsEnabled && ConfigManager.CheatRecoverTp

Make sure this is one line!


TP Recovery – Option Parameters


This section gives the exact plugin parameters used for the “TP Recovery” option found in the video above.

Settings

Help Description:
Allies will recover full TP at the start of battle,
the start of each turn, and at the end of each turn.
Symbol:
CheatRecoverTp
Show/Hide:
show = true;
Enable:
enabled = true;
Ext:
ext = 0;

Functions

Make Option Code:
this.addCommand(name, symbol, enabled, ext);
Draw Option Code:
var rect = this.itemRectForText(index);
var statusWidth = this.statusWidth();
var titleWidth = rect.width - statusWidth;
this.resetTextColor();
this.changePaintOpacity(this.isCommandEnabled(index));
this.drawOptionsName(index);
this.drawOptionsOnOff(index);
Process OK Code:
var index = this.index();
var symbol = this.commandSymbol(index);
var value = this.getConfigValue(symbol);
this.changeValue(symbol, !value);
Cursor Right Code:
var index = this.index();
var symbol = this.commandSymbol(index);
var value = this.getConfigValue(symbol);
this.changeValue(symbol, true);
Cursor Left Code:
var index = this.index();
var symbol = this.commandSymbol(index);
var value = this.getConfigValue(symbol);
this.changeValue(symbol, false);
Default Config Code:
ConfigManager[symbol] = false;
Save Config Code:
config[symbol] = ConfigManager[symbol];
Load Config Code:
ConfigManager[symbol] = !!config[symbol];


Happy RPG Making!

Librarium Animated – Tiamat Double Release!

$
0
0

TiamatRBanner

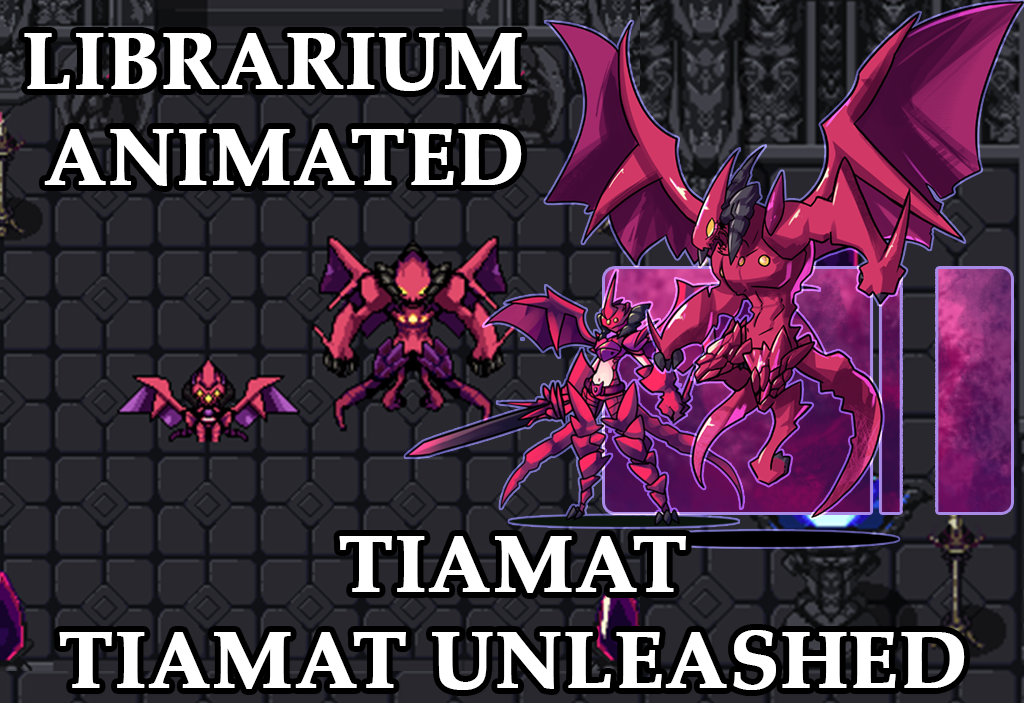
Today we see the release of Tiamat unleashed as suggested by Anonfox93 over at Patreon!, but I just couldn’t simply release her without releasing her base form, the original Tiamat, now in full dragonbones animation power with a map sprite to go with her!

After having being defeated by some wandering adventurers, Tiamat became consumed with rage and divine power she had been holding back broke through her armor and transformed her into a more monstrous/draconic aiming to inflict divine justice on her enemies and those who defeated her. I thought it would be interesting if we took an old Librarium monster and added a second form for them based on their  previous design, sorta like a final form to a boss from RPGs.  -Anonfox93

Download it today!

Support Ækashics for more content like this!

Ækashics on Twitter!

Ækashics on Youtube!

Ækashics on Tumblr!

Ækashics on Gumroad!

Ækashics on Instagram!

Librarium Monster suggestion box!

Map sprites, facesets and more!


Cheat Menu – Part 5 – Item Spawners – RPG Maker MV

$
0
0

Yanfly Engine Plugins is a plugin library made for RPG Maker MV, a wonderful piece of software to help you make that role playing game of your dreams. You can find out more about RPG Maker MV here.

Support Team Yanfly on Patreon

Item Spawners are an ever so classic mod that’s usually added to a game’s cheat menu. Item spawners can turn a game into a massive sandbox, allowing the player an immense amount of freedom to do pretty much anything he/she wants to do with the game. Watch the video above to learn about how to make these Item Spawners for your game’s cheat menu!

This advice video uses the following plugins:

You can grab the copy/paste code here:


Item Spawner – Option Parameters


This section gives the exact plugin parameters used for the “Item Spawner” option found in the video above.

Settings

Help Description:
Obtain any item from the game.
Symbol:
spawnItem
Show/Hide:
var length = SceneManager._stack.length;
var lastScene = SceneManager._stack[length - 1];
show = lastScene !== Scene_Title;
Enable:
enabled = true;
Ext:
ext = 0;

Functions

Make Option Code:
this.addCommand(name, symbol, enabled, ext);
Draw Option Code:
var rect = this.itemRectForText(index);
var statusWidth = this.statusWidth();
var titleWidth = rect.width - statusWidth;
this.resetTextColor();
this.changePaintOpacity(this.isCommandEnabled(index));
this.drawOptionsName(index);
Process OK Code:
this.playOkSound();
var goods = [];
var length = Math.min($dataItems.length, 2001);
for (var i = 0; i < length; ++i) {
 var item = $dataItems[i];
 if (!item) continue;
 if (item.name.trim() === '') continue;
 goods.push([0, item.id, 1, 0]);
}
SceneManager.push(Scene_Shop);
SceneManager.prepareNextScene(goods, false);
Cursor Right Code:
Cursor Left Code:
Default Config Code:
Save Config Code:
Load Config Code:


Weapon Spawner – Option Parameters


This section gives the exact plugin parameters used for the “Weapon Spawner” option found in the video above.

Settings

Help Description:
Obtain any weapon from the game.
Symbol:
spawnWeapon
Show/Hide:
var length = SceneManager._stack.length;
var lastScene = SceneManager._stack[length - 1];
show = lastScene !== Scene_Title;
Enable:
enabled = true;
Ext:
ext = 0;

Functions

Make Option Code:
this.addCommand(name, symbol, enabled, ext);
Draw Option Code:
var rect = this.itemRectForText(index);
var statusWidth = this.statusWidth();
var titleWidth = rect.width - statusWidth;
this.resetTextColor();
this.changePaintOpacity(this.isCommandEnabled(index));
this.drawOptionsName(index);
Process OK Code:
this.playOkSound();
var goods = [];
var length = Math.min($dataWeapons.length, 2001);
for (var i = 0; i < length; ++i) {
 var item = $dataWeapons[i];
 if (!item) continue;
 if (item.name.trim() === '') continue;
 goods.push([1, item.id, 1, 0]);
}
SceneManager.push(Scene_Shop);
SceneManager.prepareNextScene(goods, false);
Cursor Right Code:
Cursor Left Code:
Default Config Code:
Save Config Code:
Load Config Code:


Armor Spawner – Option Parameters


This section gives the exact plugin parameters used for the “Armor Spawner” option found in the video above.

Settings

Help Description:
Obtain any armor from the game.
Symbol:
spawnArmor
Show/Hide:
var length = SceneManager._stack.length;
var lastScene = SceneManager._stack[length - 1];
show = lastScene !== Scene_Title;
Enable:
enabled = true;
Ext:
ext = 0;

Functions

Make Option Code:
this.addCommand(name, symbol, enabled, ext);
Draw Option Code:
var rect = this.itemRectForText(index);
var statusWidth = this.statusWidth();
var titleWidth = rect.width - statusWidth;
this.resetTextColor();
this.changePaintOpacity(this.isCommandEnabled(index));
this.drawOptionsName(index);
Process OK Code:
this.playOkSound();
var goods = [];
var length = Math.min($dataArmors.length, 2001);
for (var i = 0; i < length; ++i) {
 var item = $dataArmors[i];
 if (!item) continue;
 if (item.name.trim() === '') continue;
 goods.push([2, item.id, 1, 0]);
}
SceneManager.push(Scene_Shop);
SceneManager.prepareNextScene(goods, false);
Cursor Right Code:
Cursor Left Code:
Default Config Code:
Save Config Code:
Load Config Code:


Happy RPG Making!


Cheat Menu – Part 6 – Debug Mode – RPG Maker MV

$
0
0

Yanfly Engine Plugins is a plugin library made for RPG Maker MV, a wonderful piece of software to help you make that role playing game of your dreams. You can find out more about RPG Maker MV here.

Support Team Yanfly on Patreon.

Debug mode, debug maps, debug menus, I’m sure you’ve all heard of them before. Perhaps even seen or played with some of them. They’re usually tools for the developers and testers, but some games opt to leave them in for the players to enjoy playing around with. Today’s video will explain how to create a Debug Mode option for your game!

This advice video uses the following plugins:

You can grab the copy/paste code here:


Debug Mode – Option Parameters


This section gives the exact plugin parameters used for the “Debug Mode” option found in the video above.

Settings

Help Description:
Turns Debug Mode ON/OFF.
Access the Debug Menu by pressing F9 on the map.
Symbol:
CheatsDebugMode
Show/Hide:
show = true;
Enable:
enabled = true;
Ext:
ext = 0;

Functions

Make Option Code:
this.addCommand(name, symbol, enabled, ext);
Draw Option Code:
var rect = this.itemRectForText(index);
var statusWidth = this.statusWidth();
var titleWidth = rect.width - statusWidth;
this.resetTextColor();
this.changePaintOpacity(this.isCommandEnabled(index));
this.drawOptionsName(index);
var halfStatusWidth = this.statusWidth() / 2;
var symbol = this.commandSymbol(index);
var value = $gameTemp.isPlaytest();
this.changePaintOpacity(!value);
this.drawText('OFF', titleWidth, rect.y, halfStatusWidth, 'center');
this.changePaintOpacity(value);
this.drawText('ON', titleWidth + halfStatusWidth, rect.y, halfStatusWidth, 'center');
Process OK Code:
$gameTemp._isPlaytest = !$gameTemp._isPlaytest;
this.redrawItem(this.index());
SoundManager.playCursor();
Cursor Right Code:
$gameTemp._isPlaytest = true;
this.redrawItem(this.index());
SoundManager.playCursor();
Cursor Left Code:
$gameTemp._isPlaytest = false;
this.redrawItem(this.index());
SoundManager.playCursor();
Default Config Code:
Save Config Code:
Load Config Code:


Happy RPG Making!


Librarium Animated – Dryad Queen Rafflesia

$
0
0

rafflesiarbanner

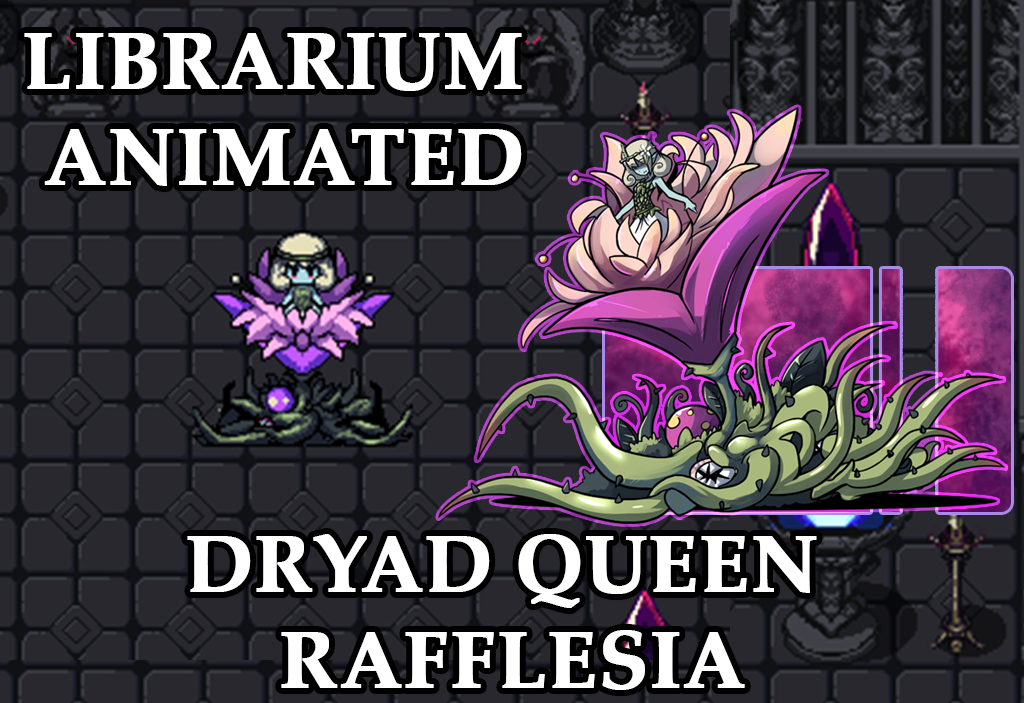
Today we see the release for Dryad Queen Rafflesia, as suggested by Gabriele Marzagali over at patreon!

The dryad queen was once an elven girl that died in a cursed forest, her soul possessed a seed and she was born again as a dryad. The upper part of her body is similar to an elven girl, with green clothes made of leaves, however instead of having legs, her body sprouts out of a giant flower, under the flower’s corolla, the stalk is made of twisted vines and roots, that protrudes like tentacles and in the midst of them a fanged gap opens like an hungry mouth. The dryad queen will kill everyone who dare enter the forest and turn them into nourishment for her offspring.  -Gabriele Marzagalli

Download it today!

Support Ækashics for more content like this!

Ækashics on Twitter!

Ækashics on Youtube!

Ækashics on Tumblr!

Ækashics on Gumroad!

Ækashics on Instagram!

Librarium Monster suggestion box!

Map sprites, facesets and more!


Librarium Animated – Grand Sorceress Duesa

$
0
0

duesarbanner

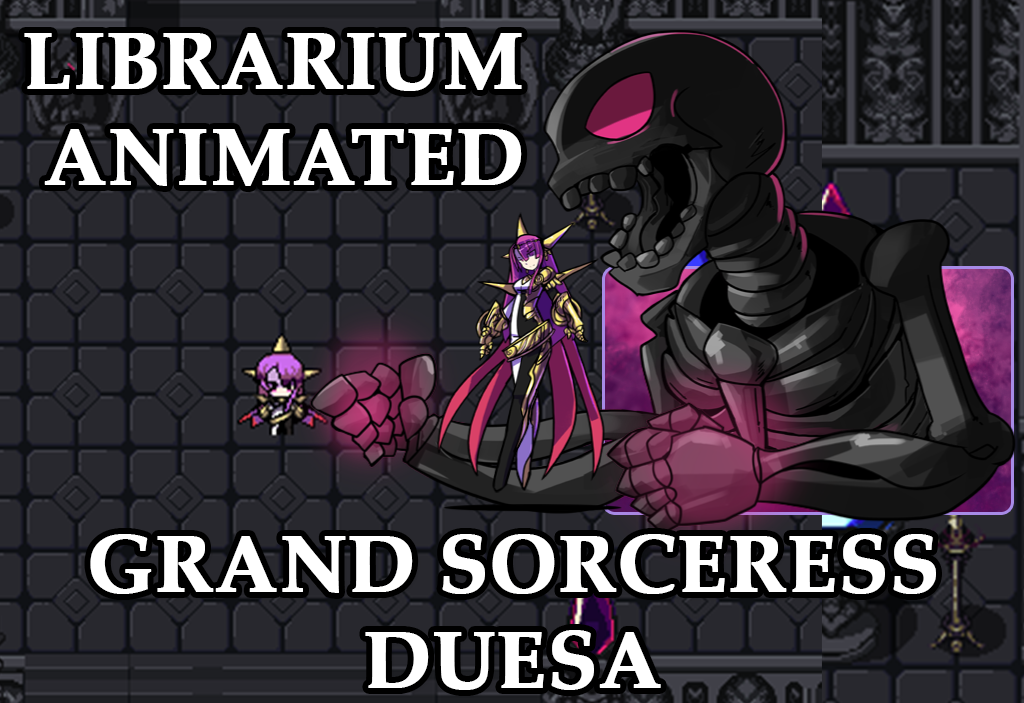
day we see the release of Grand Sorceress Duesa, as suggested by Anonfox93 over at patreon!

Some devoted their lives to studying magic for knowledge, others for power or to have control over others, some even hoped they could solve all the world’s mysteries through learning mage-craft, but Duessa looked past all of these things. To her studying magic was not purely just to gain or achieve something, it was a means to an end, to fulfill a dream she had ever since she was a little girl. To Duessa it was become the object of worship of those around her, to turn herself into something more than she already was, to transform herself into an actual goddess. -Anonfox93

Download it today!

Support Ækashics for more content like this!

Ækashics on Twitter!

Ækashics on Youtube!

Ækashics on Tumblr!

Ækashics on Gumroad!

Ækashics on Instagram!

Librarium Monster suggestion box!

Map sprites, facesets and more!

YEP.166 – Message Speed Option – RPG Maker MV

$
0
0

Yanfly Engine Plugins is a plugin library made for RPG Maker MV, a wonderful piece of software to help you make that role playing game of your dreams. You can find out more about RPG Maker MV here.

You can grab the plugin here:
English Dropbox
English Mirror

Support Team Yanfly on Patreon

The option to control the message speed is quite common in RPG’s nowadays. Players can put in whatever option they feel like for the text to go at, or if they wish, to have the text display instantly! This plugin will add in the ‘Message Speed’ option into your Options Menu for players to adjust! It comes with speeds from 0 (slowest) to 10 (fastest) and even an “11th” speed of being instant!


Introduction


This plugin requires YEP_MessageCore. Make sure this plugin is located under YEP_MessageCore in the plugin list.

The option to control the message speed is quite common in RPG’s nowadays. Players can put in whatever option they feel like for the text to go at, or if they wish, to have the text display instantly! This plugin will add in the ‘Message Speed’ option into your Options Menu for players to adjust! It comes with speeds from 0 (slowest) to 10 (fastest) and even an “11th” speed of being instant!


Options Core Settings – Adding the New Options


If you are using YEP_OptionsCore.js, you can add a new Option using this plugin. Here’s the following code/parameter settings you can use with it.

Settings

Help Description:
Changes the speed text is displayed during messages.
Symbol:
messageSpeed
Show/Hide:
show = Imported.YEP_X_MessageSpeedOpt;
Enable:
enabled = true;
Ext:
ext = 0;

Functions

Make Option Code:
this.addCommand(name, symbol, enabled, ext);
Draw Option Code:
var rect = this.itemRectForText(index);
var statusWidth = this.statusWidth();
var titleWidth = rect.width - statusWidth;
this.resetTextColor();
this.changePaintOpacity(this.isCommandEnabled(index));
this.drawOptionsName(index);
var value = this.getConfigValue(symbol);
var rate = ((value) / 10).clamp(0, 1);
if (value > 10) {
 var gaugeColor1 = this.textColor(14);
 var gaugeColor2 = this.textColor(6);
} else {
 var gaugeColor1 = this.textColor(20);
 var gaugeColor2 = this.textColor(21);
}
this.drawOptionsGauge(index, rate, gaugeColor1, gaugeColor2);
this.drawText(this.statusText(index), titleWidth, rect.y, statusWidth, 'center');
Process OK Code:
var index = this.index();
var symbol = this.commandSymbol(index);
var value = this.getConfigValue(symbol);
value += 1;
if (value > 11) value = 0;
value = value.clamp(0, 11);
this.changeValue(symbol, value);
Cursor Right Code:
var index = this.index();
var symbol = this.commandSymbol(index);
var value = this.getConfigValue(symbol);
value += 1;
value = value.clamp(0, 11);
this.changeValue(symbol, value);
Cursor Left Code:
var index = this.index();
var symbol = this.commandSymbol(index);
var value = this.getConfigValue(symbol);
value -= 1;
value = value.clamp(0, 11);
this.changeValue(symbol, value);
Default Config Code:
Save Config Code:
Load Config Code:


Happy RPG Making!


5 Free & Useful Software for Game Making – RPG Maker MV

$
0
0

Yanfly Engine Plugins is a plugin library made for RPG Maker MV, a wonderful piece of software to help you make that role playing game of your dreams. You can find out more about RPG Maker MV here.

Support Team Yanfly on Patreon

Making your game with just RPG Maker MV alone is certainly possible, but you’ll need more than just that if you wish to customize your game and do more for it! Here are five software I personally recommend to enhance your game making potential!

Paint.NET
Audacity
Twine
Sublime Text
OBS Studio

Librarium Animated – Hellhound Garm

$
0
0

Today we see the release for Hellhound Garm, as suggested by Clint Carlson over at patreon!

Garm is said to be to canines what Odin is said to be to the Gods. He is the king of all hellhounds and he is the prime guardian to Hel. Chained up by the Gods he breaks free of his chains to channel destructive forces on the world. -Clint Carlson

Download it today!

Support Ækashics for more content like this!

Ækashics on Twitter!

Ækashics on Youtube!

Ækashics on Tumblr!

Ækashics on Gumroad!

Ækashics on Instagram!

Librarium Monster suggestion box!

Map sprites, facesets and more!


YEP.167 – Message Backlog – RPG Maker MV

$
0
0

Yanfly Engine Plugins is a plugin library made for RPG Maker MV, a wonderful piece of software to help you make that role playing game of your dreams. You can find out more about RPG Maker MV here.

You can grab the plugin here:
English Dropbox
English Mirror

Support Team Yanfly on Patreon

It’s not uncommon for RPG’s to have a message backlog, an in-game tool for the player to review any and all dialogue he/she has encountered previously. This tool can be helpful in case a player would accidentally skip some dialogue and/or would like to revisit what kind of messages were made before making a decision during an important moment.

This plugin creates a message backlog system for your game’s message system. Upon pressing ‘Shift’ (or any other button you desire) during a message, the player can open up a Backlog window to review over the last 20 encountered messages (number of stored messages can be modified within the parameters). These saved messages can also include any choices from the choice lists they have selected, any numbers they may have inputted, or items they selected from special events.

Now, your players can go forward, knowing full well they have little to worry about in case they’ve missed any messages.


Introduction


This plugin requires the following plugins:
– YEP_MessageCore

Note: If you have any Extended Message Pack plugins from the YEP library, place this plugin under those entries in the plugin list.

It’s not uncommon for RPG’s to have a message backlog, an in-game tool for the player to review any and all dialogue he/she has encountered previously. This tool can be helpful in case a player would accidentally skip some dialogue and/or would like to revisit what kind of messages were made before making a decision during an important moment.

This plugin creates a message backlog system for your game’s message system. Upon pressing ‘Shift’ (or any other button you desire) during a message, the player can open up a Backlog window to review over the last 20 encountered messages (number of stored messages can be modified within the parameters). These saved messages can also include any choices from the choice lists they have selected, any numbers they may have inputted, or items they selected from special events.

Now, your players can go forward, knowing full well they have little to worry about in case they’ve missed any messages.


Disabled Text Codes


Due to the nature of some text codes, some of them are disabled for the message log. Most of the default RPG Maker MV text codes will work, but some custom ones added through the Message Core or Extension Packs are disabled for various reasons. Here is a list of those disabled message codes:

    RPG Maker MV Default:
    \{          Changes to font sizes cause errors in the backlog.
    \}          Changes to font sizes cause errors in the backlog.

    Message Core:
    \AF[x]      Face graphics aren't displayed in the backlog.
    \PF[x]      Face graphics aren't displayed in the backlog.
    \FS[X]      Changes to font sizes cause errors in the backlog.

    \PY[X]      While this works, it is known to cause some problems.

    Extended Message Pack 1:
    \LSON       Letter sounds are disabled for the backlog.
    \LSOFF      Letter sounds are disabled for the backlog.
    \LSR        Letter sounds are disabled for the backlog.
    \FACEINDEX  Face graphics aren't displayed in the backlog.
    \MSGPOSX    Backlog does not change message window size.
    \MSGPOSY    Backlog does not change message window size.
    \MSGEVENT   Backlog does not change message window size.
    \MSGACTOR   Backlog does not change message window size.
    \MSGPARTY   Backlog does not change message window size.
    \MSGENEMY   Backlog does not change message window size.
    \AUTOEVENT  Backlog does not change message window size.
    \AUTOACTOR  Backlog does not change message window size.
    \AUTOPARTY  Backlog does not change message window size.
    \AUTOENEMY  Backlog does not change message window size.
    \MSGROWS    Backlog does not change message window size.
    \MSGWIDTH   Backlog does not change message window size.
    \AUTO       Backlog does not change message window size.
    \MSGRESET   Backlog does not change message window size.

    Extended Message Pack 2:
    - Quantity, Actor, and Enemy text codes will be converted before added.
    This is so the data made will be localized instead of current.

Plugin Commands


The following plugin commands can be used to alter various settings
regarding the Message Backlog.

Plugin Command:

EnableMessageBacklog
DisableMessageBacklog
– This enables/disables the message backlog from being player accessed.

EnableMessageLogging
DisableMessageLogging
– If enabled, new messages will be recorded to the backlog. If disabled, they won’t be recorded.

OpenMessageBacklog
– This will forcefully open the message backlog if done on the map scene. (Highly recommended to be used with Button Common Events)


Happy RPG Making!


Viewing all 184 articles
Browse latest View live